Do you want to Disable Automatic Updates on Windows 11? However, software updates are an important part of our computer’s health and security. When new updates become available in Windows 11, they are automatically downloaded and installed on your computer.
But sometimes these updates frustrate the user a lot. Some updates contain bugs that can negatively affect the user experience and require a restart of the computer to complete the installation, which also disrupts the current workflow.
In this article, I will show you how to turn off Auto Update in Windows 11.
» Windows 11 Free Download ISO file
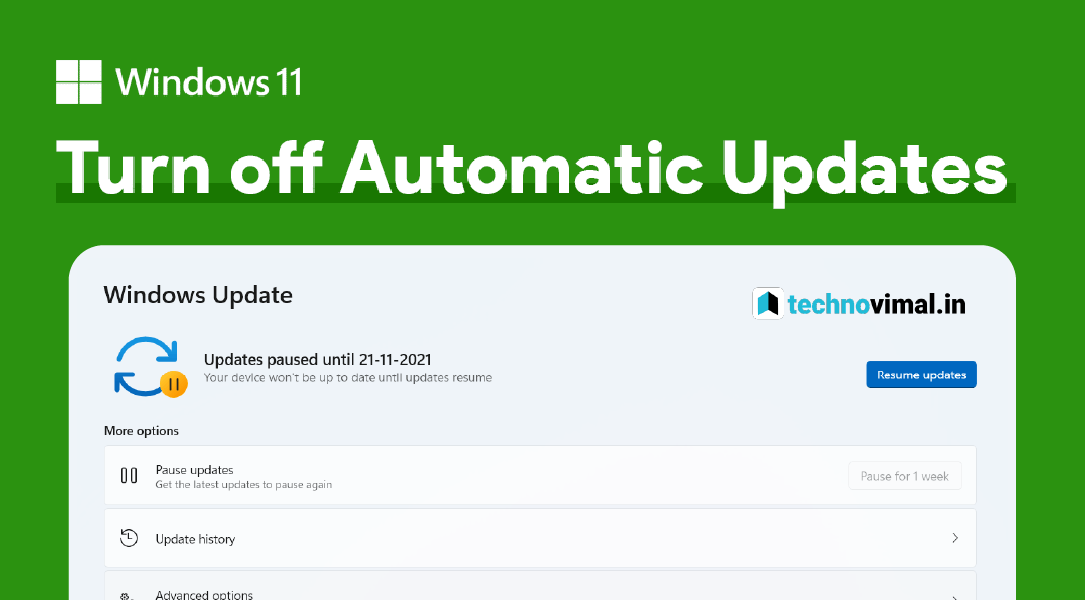
How to Disable Windows 11 Automatic Updates
There are a few ways you can disable Windows Update. so let’s see
How to permanently disable Windows 11 update
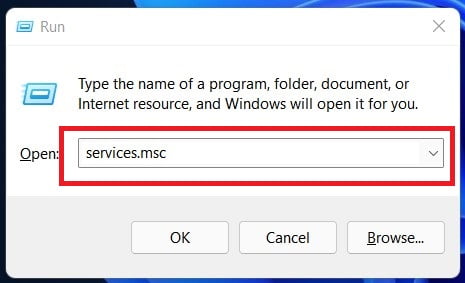
1. To access your PC’s service settings, press Win + R on the keyboard and type “services.msc“.
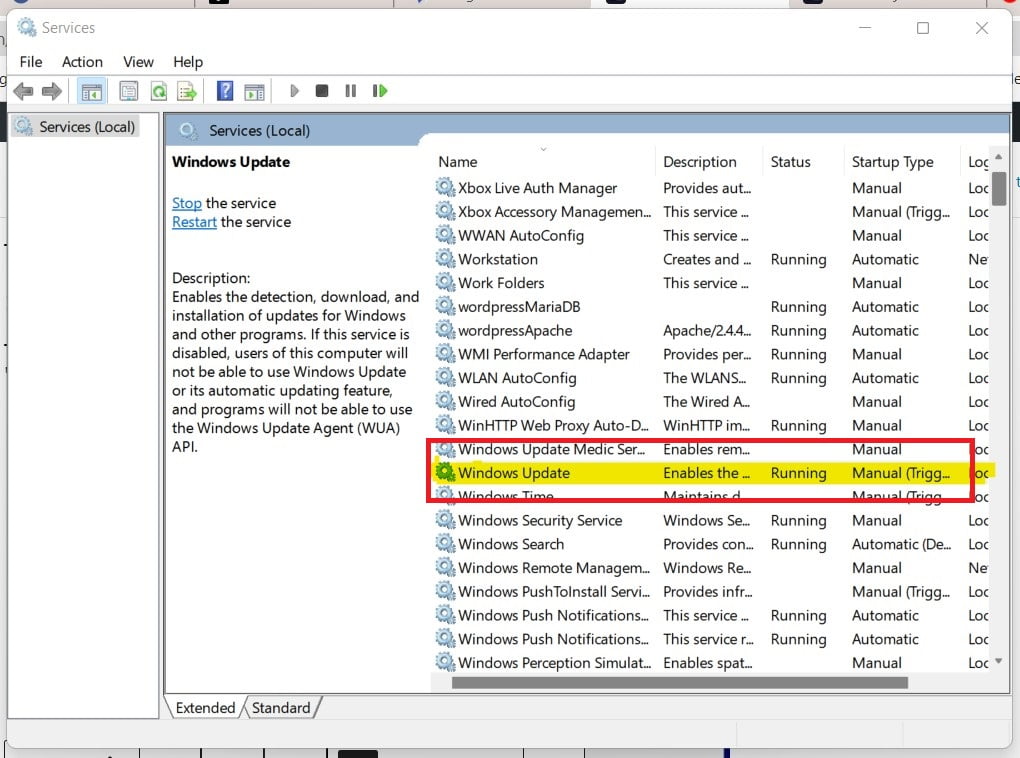
2. Double click on “Windows Update Services” to go to General settings.
3. Then choose Disable from the Startup dropdown.
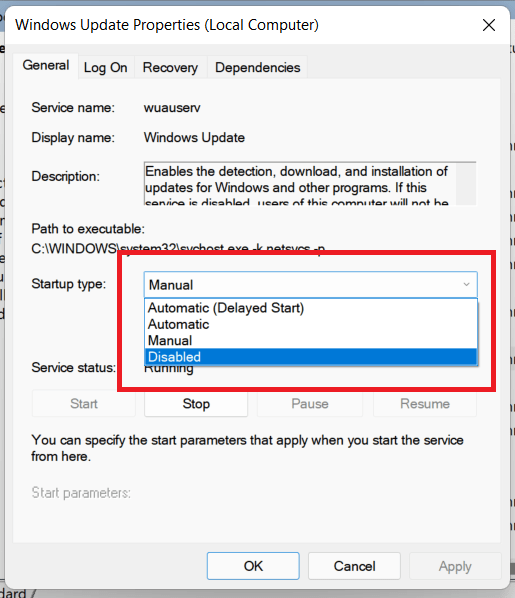
4. Now, click on ‘Ok’ and restart your PC.
This step will permanently disable automatic updates in Windows 11. If you want to enable it again, follow the same steps and select the Automatic option.
» Windows 11 Free Download ISO file
How to disable automatic updates with Settings
If you don’t want to disable Windows 11 updates permanently, you can skip the updates… You can pause updates from Settings until the day you want to update them.
To turn off Windows updates temporarily, follow these steps:
1. Go to Settings >> Windows Update >> and click on Pause updates options.
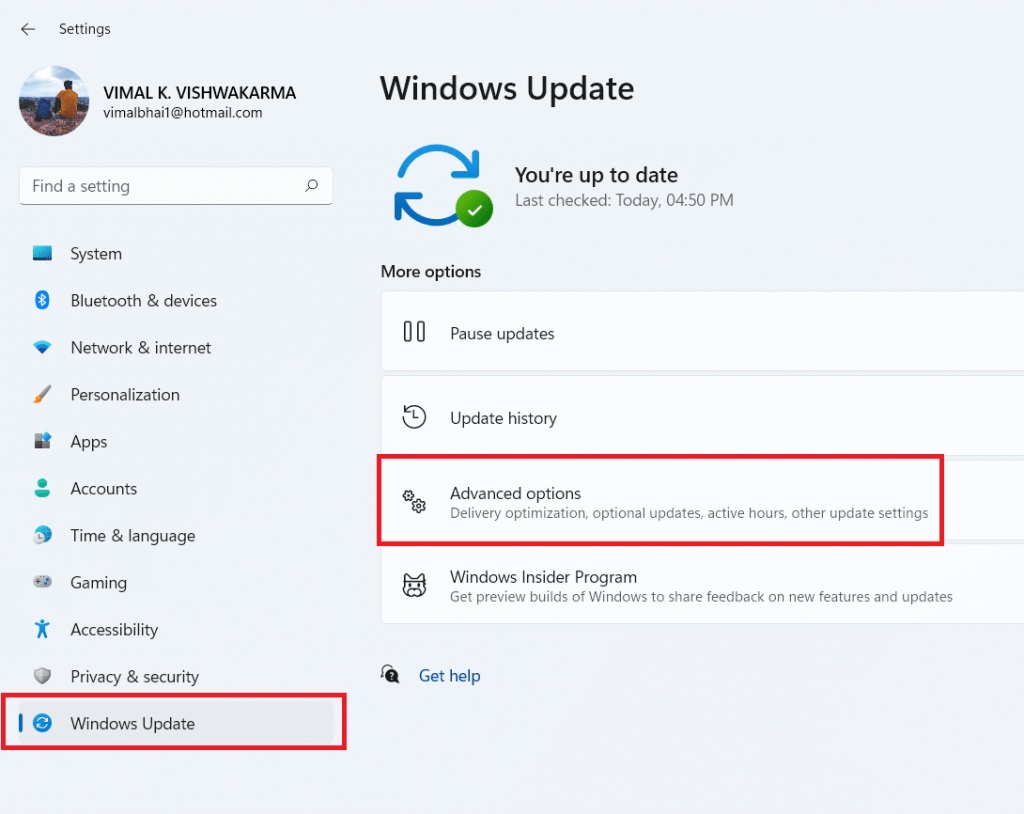
2. Now under the “Pause updates” section, you can choose a date from the dropdown for when you want to disable automatic updates.
This isn’t a permanent solution to disabling Windows Updates, but if you just need to pause updates for a while, this step will help you.
How to disable automatic updates with Registry
You can disable Windows 11 update permanently by modifying the registry. Simply follow the steps given below:
» Windows 11 Free Download ISO file
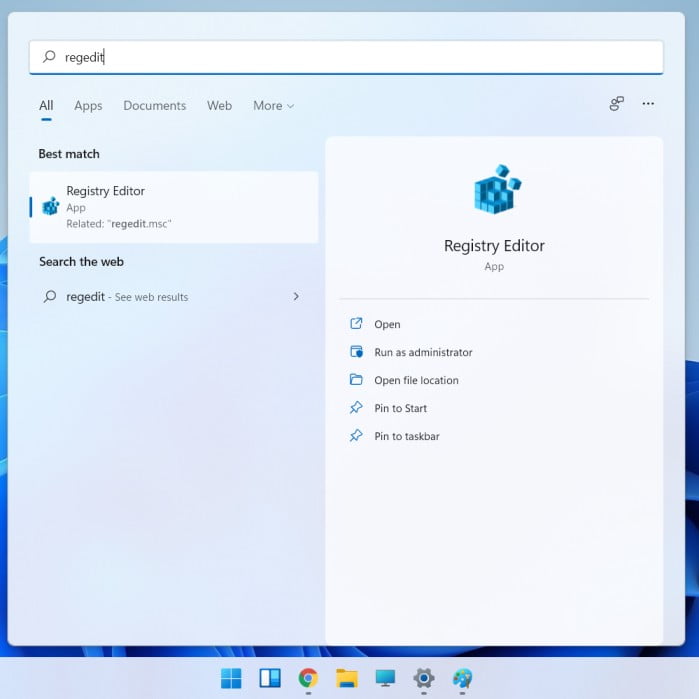
1. Press Win + R on the keyboard and search for “regedit“ and click on Registry Editor.
2. Then go to the following path: HKEY_LOCAL_MACHINE\SOFTWARE\Policies\Microsoft\Windows
3. Now you have to add the value which tells the system that you do not want to download Windows 11.
5. Name the key WindowsUpdate and press Enter.
6. Right-click on the newly created Key (WindowsUpdate) and then select New >> Key.
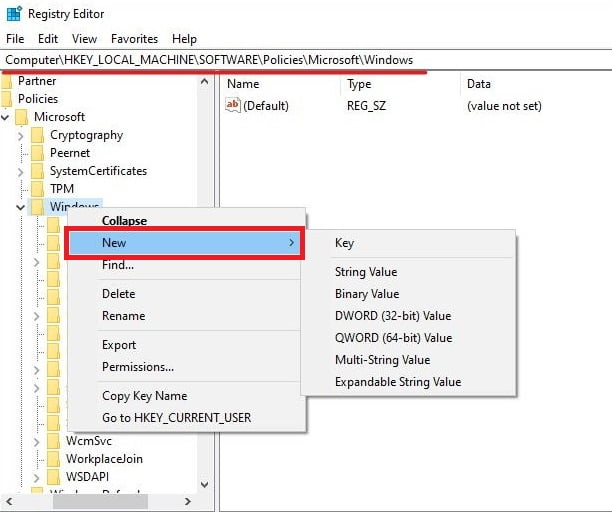
7. Name the new key AU and click Enter.
8. Right-click on the AU key, then select New and click on the DWORD (32-bit) Value option.
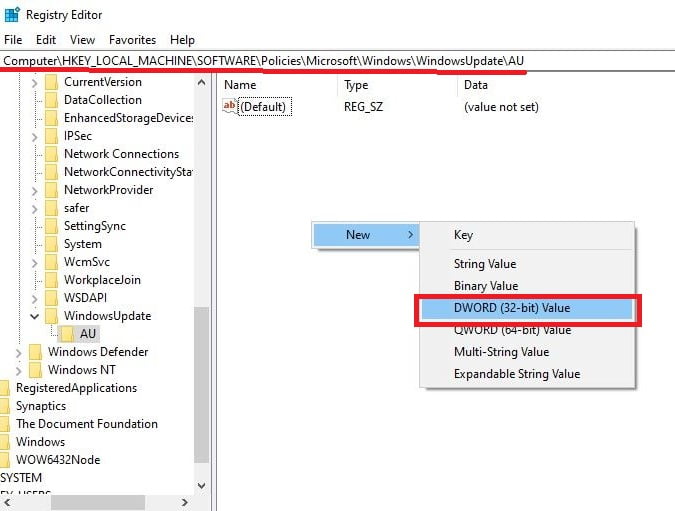
9. Name the new DWORD as NoAutoUpdate and press Enter.
10. Double click on NoAutoUpdate and change its value from 0 to 1. Then click “OK”.
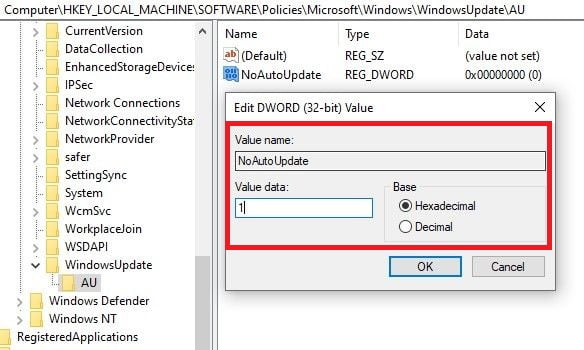
11. Close Registry Editor and restart your computer.
Once you have completed the steps, cumulative updates will not be downloaded and installed automatically. However, when a new update becomes available, you will get the option to install it manually from the Windows Update settings.
You can always use the same instructions to restore the original settings, but at step number 4, right-click on the WindowsUpdate key, select the Delete option and restart the device.
Whether you use Windows 11 or any other OS, updates are necessary to fix security vulnerabilities, solve problems, and improve the overall experience. However, sometimes, there are good excuses for disabling them. For example, when you want to have complete control over system updates. You want to minimize the chances of running into problems due to buggy releases. Or you are using an important application or device, and you don’t want to face any compatibility issue.
You may also like:


