Do you know that when you get a new computer, the theme of your system is the default which is very simple in appearance? If you want to change the look of your computer, then for this you can install your favorite themes in Windows 11, we are going to give you complete A to Z information on how to change the themes of Windows 11, So let’s start.

How to Change Themes on Windows 11
To give a good look to your computer screen, you have to follow the steps given below to set the themes of your choice in Windows 11:–
» Windows 11 Disable Automatic Updates
- First of all you have to turn on your PC.
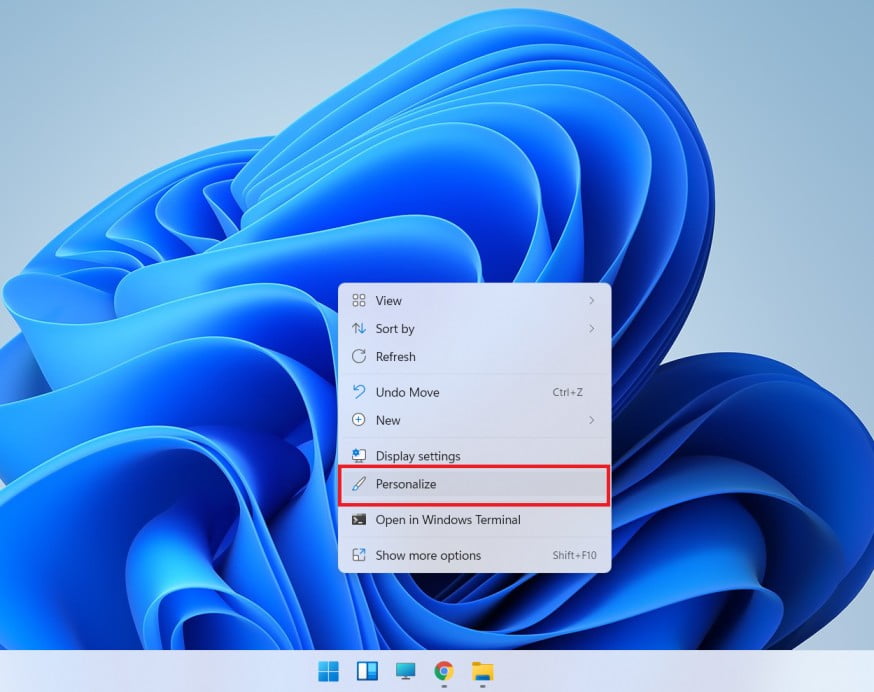
- Now you have to Right Click and after that you have to click on Personalize.

» Upgrade Windows 10 to Windows 11
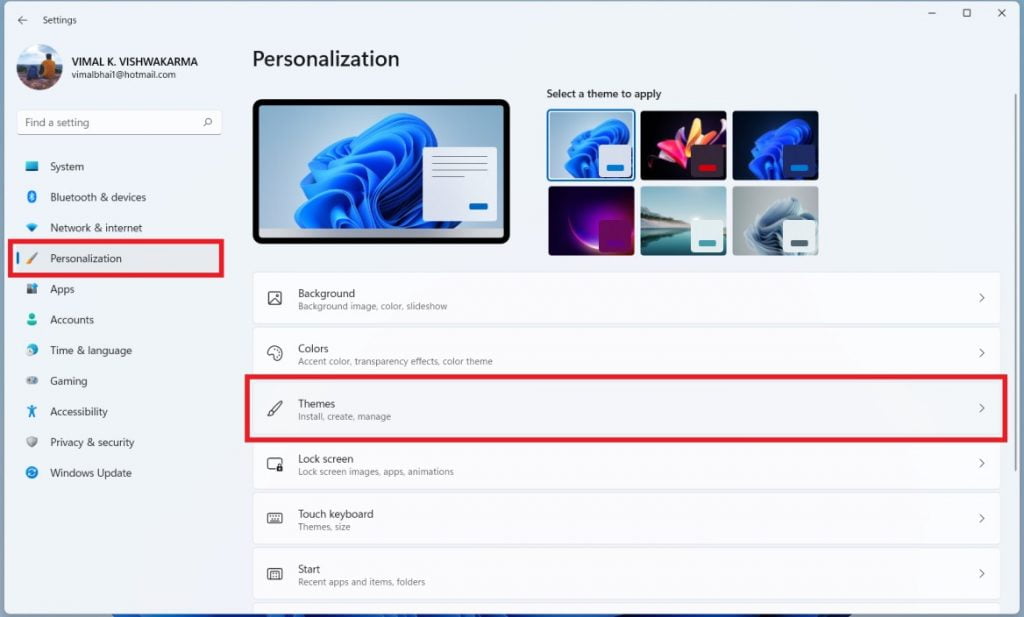
- Now this kind of user interface comes in front of you as shown in the screenshot.
- After this you have to click on Themes option where you get to see the default theme.


» Windows 11 Minimum System Requirements
5. To make your system look good, you can install the themes of your choice by clicking on Get More themes in Microsoft Store.

Windows 7
If you use Windows 7, it doesn’t matter that you can install New Look Themes from Microsoft Store on the Internet.
Windows 8.1
If you use Windows 8.1, then you get to see great themes for this on the Microsoft Store, so that you can install the themes of your choice and give a very attractive look to your system.
Conclusion
I hope that you will be able to install your favorite Theme very easily in Windows 7, Windows 8, Windows 10, Windows 11 and if still there is any problem then you can tell us in the comment box, our team will contact you soon.


